 The
name of the output and the logfile is automatically assigned and put in the
same location as the source, but you can of course change that by pressing the
appropriate button.
The
name of the output and the logfile is automatically assigned and put in the
same location as the source, but you can of course change that by pressing the
appropriate button.HC Guide
What does HC stand for? I guess Hank's mpeg-2 enCoder would fit since the author goes by the name of Hank. Either way, HC has quickly developed into a very interesting alternative to expensive MPEG-2 encoders like CCE SP. I leave it up to you to decide which one is better, but you can certainly not beat the pricetag - and many applications using MPEG-2 encoders have been quick to support HC as well.
You'll need the following software for this guide
Step 1: Create a DGIndex project
HC only supports DGIndex projects and AviSynth scripts as input. If you do not need to perform any special operation on the source, like changing the resolution, perform IVTC or deinterlace, using DGIndex is the best option. When using DGIndex project files as direct input, you have to make sure that you copy dgdecode.dll to your HC directory.
Step 1a: Frameserve a DGIndex project via AviSynth
If you need to perform operations on your source prior to encoding, you'll have to first create a DGIndex project, then frameserve this via AviSynth into HC. If your source is an AVI file, this guide on resizing AVIs for DVD encoding might also come in handy.
Step 2: Encoding the video
Once you have your script ready, start up HC and click on the Input button to select your video source.
The
name of the output and the logfile is automatically assigned and put in the
same location as the source, but you can of course change that by pressing the
appropriate button.
Then you have to assign a bitrate. You can specify both an average and a maximum
bitrate. I suggest you keep the maximum to 9000 so that you won't get any problems
when using more than one audio track. You are not required to specify a bitrate
though. You can check set file length and then enter the desired size
of the file HC is going to produce.

Then you can chose between three encoding profiles:
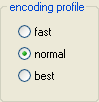 Fast
sacrifices quality for speed, and best does the inverse. I suggest you experiment
with these three profiles to find the optimal one for your quality / speed needs.
Fast
sacrifices quality for speed, and best does the inverse. I suggest you experiment
with these three profiles to find the optimal one for your quality / speed needs.
It is possible to limit the range of frames HC is going to encode:
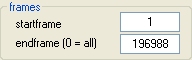 Simply
assign a different startframe (1 is the start of the video) and endframe
to limit the range of the source that HC will encode. By default, HC will put
the number of frames in the endframe field, so everything will be encoded.
Simply
assign a different startframe (1 is the start of the video) and endframe
to limit the range of the source that HC will encode. By default, HC will put
the number of frames in the endframe field, so everything will be encoded.
Then you can configure the GOP structure:
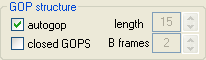 If you
leave autogop checked, HC will automatically pick the proper GOP size
for you. When encoding content that is going to be used in a multiangle section,
you should check closed GOPS. If you uncheck autogop, you can
configure the GOP length on your own: The standard for an NTSC DVD is length
15 and 2 B frames, for PAL it is length 12 and 2 B frames.
If you
leave autogop checked, HC will automatically pick the proper GOP size
for you. When encoding content that is going to be used in a multiangle section,
you should check closed GOPS. If you uncheck autogop, you can
configure the GOP length on your own: The standard for an NTSC DVD is length
15 and 2 B frames, for PAL it is length 12 and 2 B frames.
Then we have the miscellaneous settings:
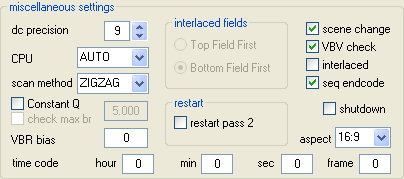 The
dc precision should match your source. DVDs normally are 10 bit. Leaving
the CPU setting at AUTO will ensure that the proper CPU optimizations
are enabled for your CPU type.
The
dc precision should match your source. DVDs normally are 10 bit. Leaving
the CPU setting at AUTO will ensure that the proper CPU optimizations
are enabled for your CPU type.
Leave the scan method at ZIGZAG for progressive content, and set it to ALTERNATE for interlaced content. When dealing with interlaced content, you also have to configure the field order in the interlaced fields section. This section only becomes active if you check interlaced.
If you check Constant Q, you enable the constant quantizer mode - the bitrate settings will become disabled. If this mode is enabled, you can check check max br and the maximum bitrate field will become active again, so you can enforce a maximum bitrate.
Using the VBR bias, you can modify how bitrate is allocated - the lower the value the faster the bitrate can change (so 0 is full VBR and 100 is full CBR)
After a 2 pass encode, the restart option can be used to run the second pass again with different parameters, without having to redo the first pass as well. To do this, check restart pass 2, then click on get restart info , then you can change all the parameters not grayed out. Finally press the restart button to redo the second pass.
Leaving scene change enabled will ensure that HC detects scene changes and forces an I-frame at this position to improve quality of cuts. You should also keep VBV check enabled, as it ensures that the video can be properly decoded on standalone players. Also keep the seq endcode checked.
Checking shutdown will make HC shut down your PC after encoding.
Finally, you can assign an aspect ratio to the video using the aspect dropdown, and change the timecode of the start frame (you shouldn't do that).
Last but not least, HC allows you to use different quantizer matrices:
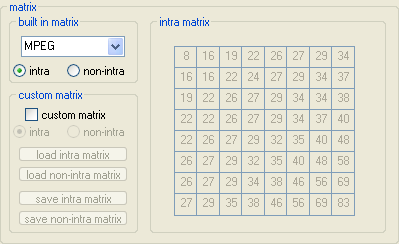 HC
has a number of built-in matrices that you can use for intra (I) and non-intra
(P and B) frames.
HC
has a number of built-in matrices that you can use for intra (I) and non-intra
(P and B) frames.
If you check custom matrix, you can load your own matrixes, and the matrix becomes enabled, so you can create your own custom quantizer matrices right here in HC and even save them.
If you don't know what a quantizer matrix is, I strongly suggest that you do not create your own matrices.
Now that everything is configured, you're ready for encoding. Press the encode
button to start encoding.
During encoding, HC can show keep you up-to-date on the progress via the preview window. You can turn off preview for a small speed increase, or turn it on and configure it using the preview control settings:
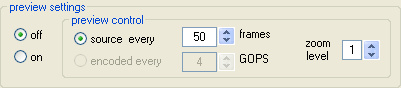
In addition to the preview, HC also keeps you up-to-date with a number of encoding statistics, which are rather self-explanatory.
This document was last updated on January 4, 2009